Secure Proxmox VE with fail2ban
Proxmox VE basierend auf Debian 12 mit fail2ban absichern
Eine Möglichkeit einen öffentlichen Proxmox Server gegen Brute Force-Angriffe abzusichern, ist der Einsatz von dem Tool ‘fail2ban’.
In diesem kurzen Tutorial zeige ich, wie mit Hilfe von fail2ban, der Zugriff des Service ‘SSH’ und der Zugriff auf den Port ‘8006’ des Dashboards, abgesichert wird.
Ausgangslage
In diesem Szenario handelt es sich um einen Proxmox-Server der als Dedicated-Server bei Hetzner gehostet wird, und über eine IPv4- sowie IPv6-Adresse über das öffentliche Internet erreichbar ist.
Generell ist der Einsatz von fail2ban nur als ein Teil von Sicherheitsmaßnahmen zur Serverabsicherung anzusehen. Gerne könnt ihr auch weitere Sicherungsmaßnahmen hier auf meinem Blog zur Rate ziehen.
Voucher
Wer auch einen VPS- / Root- / Dedicated-Server betrieben möchte, dem kann ich ein 20 Euro Gutschein anbieten. Um diesen Gutschein zu nutzen, auf den untenstehenden Link klicken.
Der Gutschein in Höhe von 20 Euro, ist nur bei einer Neuregistrierung auf der Hetzner-Webseite nutzbar!
Link to the voucher: https://hetzner.cloud/?ref=OBFauh7A1Ru8
Further protective measures for public servers under Linux
Installation of fail2ban under Debian 12
Important note!
Bitte beachten, dass alle weiter ausgeführten Befehle mit erhöhten Privilegien ausgeführt werden!
Diese Rechte erhaltet ihr wenn ihr einmalig für die bestehende SSH-Sitzung den folgenden Befehl ausführt:
sudo -s
Since Proxmox VE is based on the Debian distribution, fail2ban is installed in the same way as a classic Debian installation.
We have two options for setting up fail2ban on the Proxmox system.
- Setup via the Proxmox dashboard
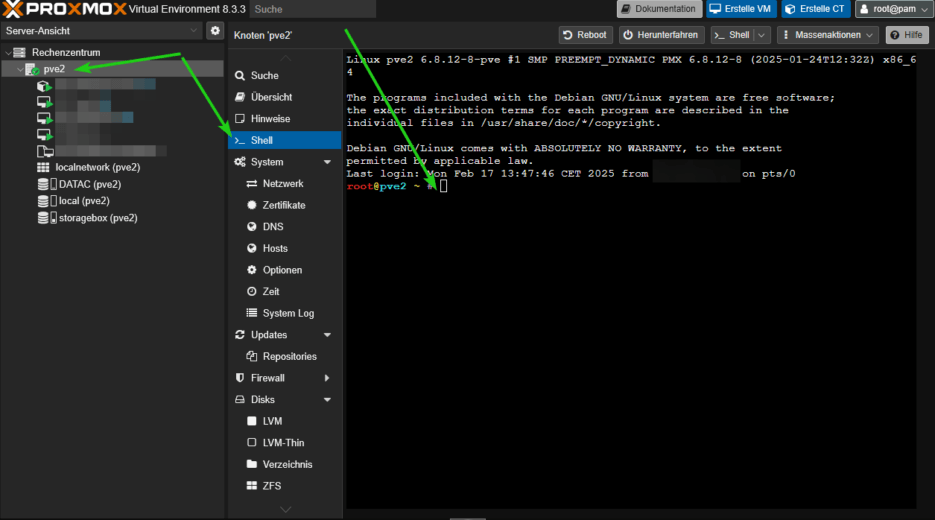
- For the setup via the Proxmox dashboard, click on the Proxmox node and select the ‘Shell’ item and then enter the corresponding configuration entries here.
- Setup via terminal using an SSH connection to the Proxmox server.
- In my example, we will connect to the Proxmox server via a terminal using SSH. The advantage here is the greater convenience, e.g. when using copy & paste.
For the setup via the Proxmox dashboard, click on the Proxmox node and select the ‘Shell’ item and then enter the corresponding configuration entries here.

SSH connection via terminal with the Proxmox server
First, we establish a connection to the Proxmox server via SSH. Depending on your operating system, you can use a terminal window, Putty or similar for this.
# Establish an SSH connection

ssh root@<IP-Adresse-Proxmox-Server>
Updating the operating system and installing fail2ban
# Upgrade system

sudo apt update && apt upgrade -y

# Installation of fail2ban

sudo apt install fail2ban
Customization of the fail2ban configuration for Proxmox VE
As described in the introduction of this tutorial, we want to protect the standard SSH port (22) and port 8006 for the dashboard interface of Proxmox VE against brute force attacks.
First, we create a local jail config file in the fail2ban directory, in which we then store the customization for our project.
# First, we will look at the directory of fail2ban, where the future and other configuration files are located.

cd /etc/fail2ban

# Creating the config file for fail2ban

nano jail.conf
In the next step, we add the configuration for securing the SSH connection and the security for port 8006.
# Configuration for fail2ban - protection of SSH (standard port 22) and dashboard access Proxmox (port 8006)

# Default-Settings for fail2ban

[DEFAULT]
allowipv6 = auto
bantime = 3600
backend = systemd
ignoreip = 127.0.0.1/8

# Config für SSH

[sshd]
mode = aggressive
port = ssh
logpath = %(sshd_log)s
banaction = nftables-multiport
banaction_allports = nftables-allports
backend = systemd
enabled = true
maxretry = 2
findtime = 3600
bantime = 3h

# Config for Proxmox

[proxmox]
enabled = true
port = https,http,8006
filter = proxmox
backend = systemd
maxretry = 3
findtime = 3600
bantime = 3h
Now save the config file ‘jail-local’ with CTRL + O and close the nano editor with CTRL + X
Ignore IP
Under ‘ignoreip’ you have the option of adding IP addresses and subnets as exceptions, for example to prevent yourself from being locked out.
Create Proxmox filter for fail2ban
A filter config for SSH is included in fail2ban by default. We must first create the filter config for Proxmox.
To do this, we change to the directory ‘/etc/fail2ban/filter.d’ and create the filter config for Proxmox here with ‘nano proxmox.conf’.
# Filter-Config proxmox

[Definition]
failregex = pvedaemon\[.*authentication failure; rhost=<HOST> user=.* msg=.*
ignoreregex =
journalmatch = _SYSTEMD_UNIT=pvedaemon.service
Also save this file with CTRL + O and exit the editor with CTRL + X.
fail2ban-Dienst starten und prüfen
Now that we have created the required config files, we can go ahead and start fail2ban on the system.
# Activate fail2ban autostart, start service

systemctl enable fail2ban
systemctl start fail2ban

# Check fail2ban status

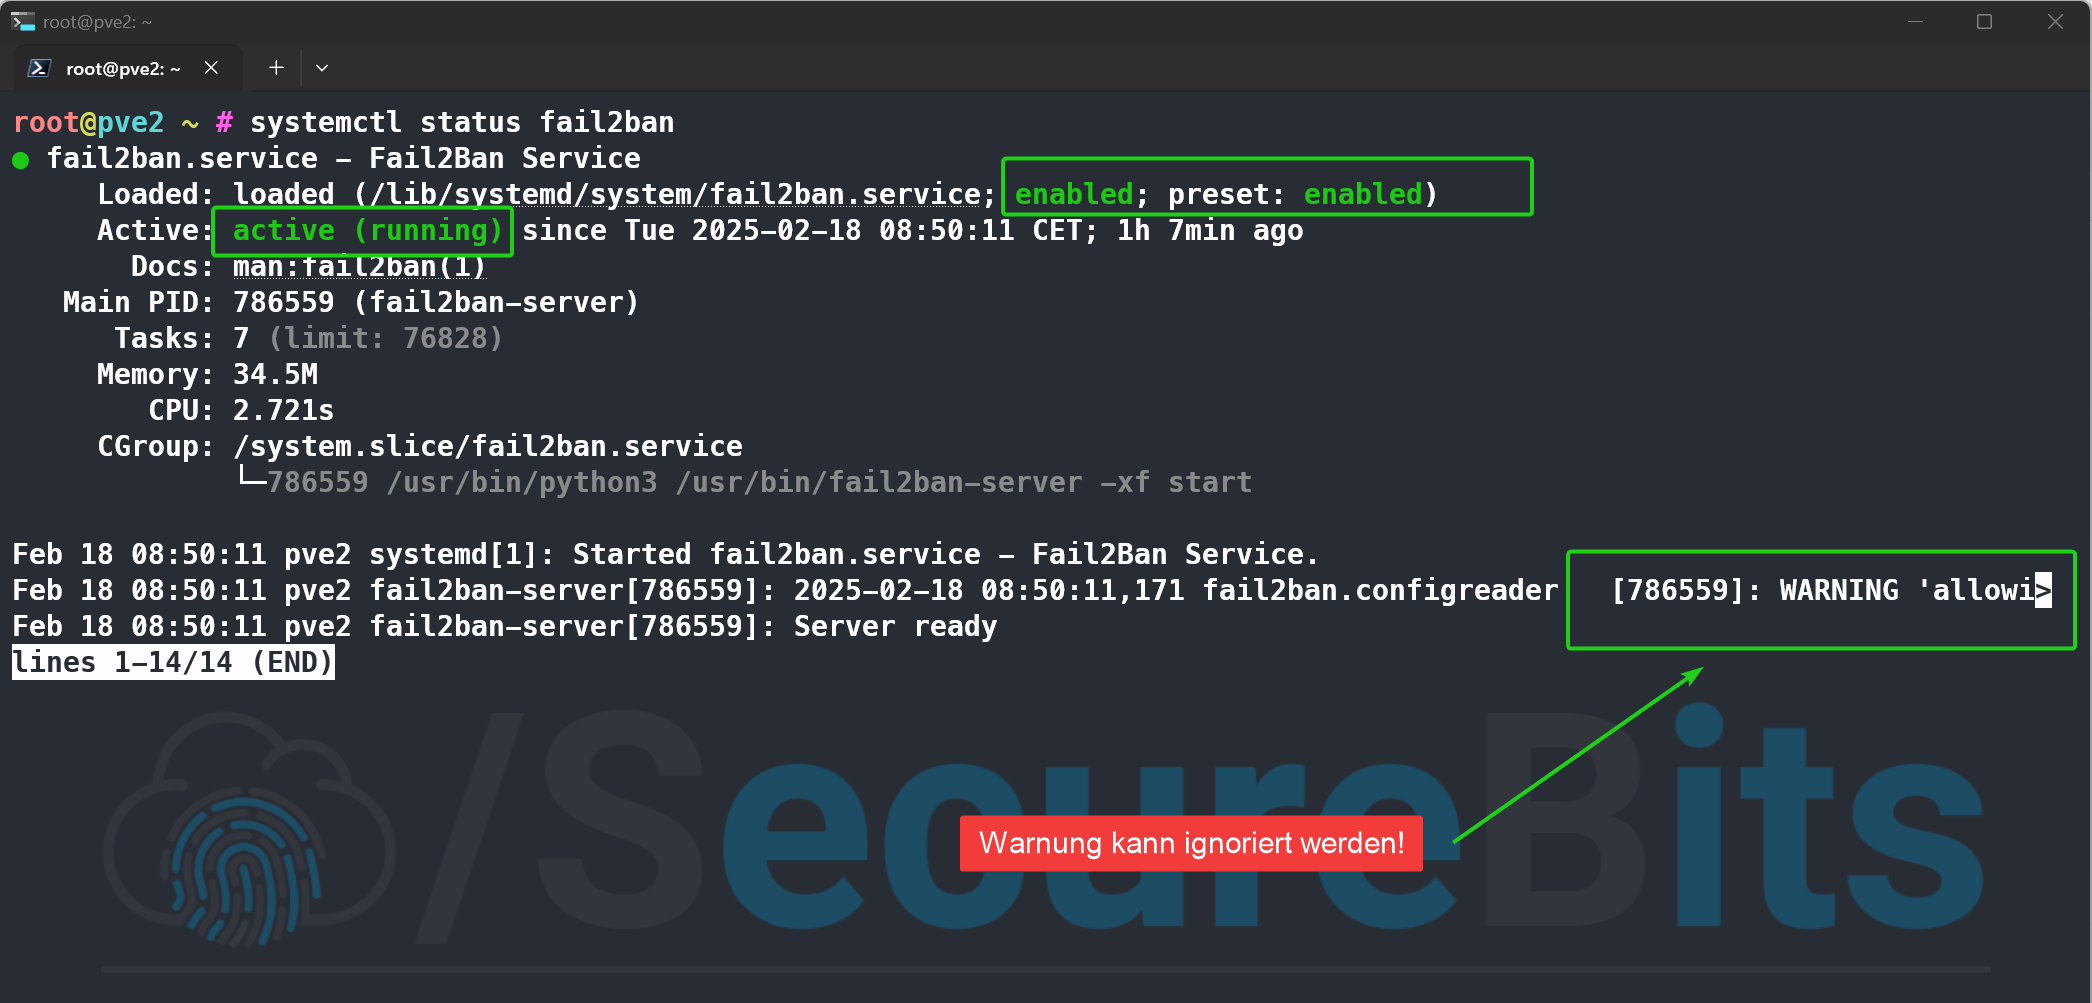
systemctl status fail2ban
output should look something like this:

A few additional commands for fail2ban
Here are a few more commands that you can use to ‘control’ fail2ban.
Displaying the banned IP addresses
# Blocked IP addresses for SSH

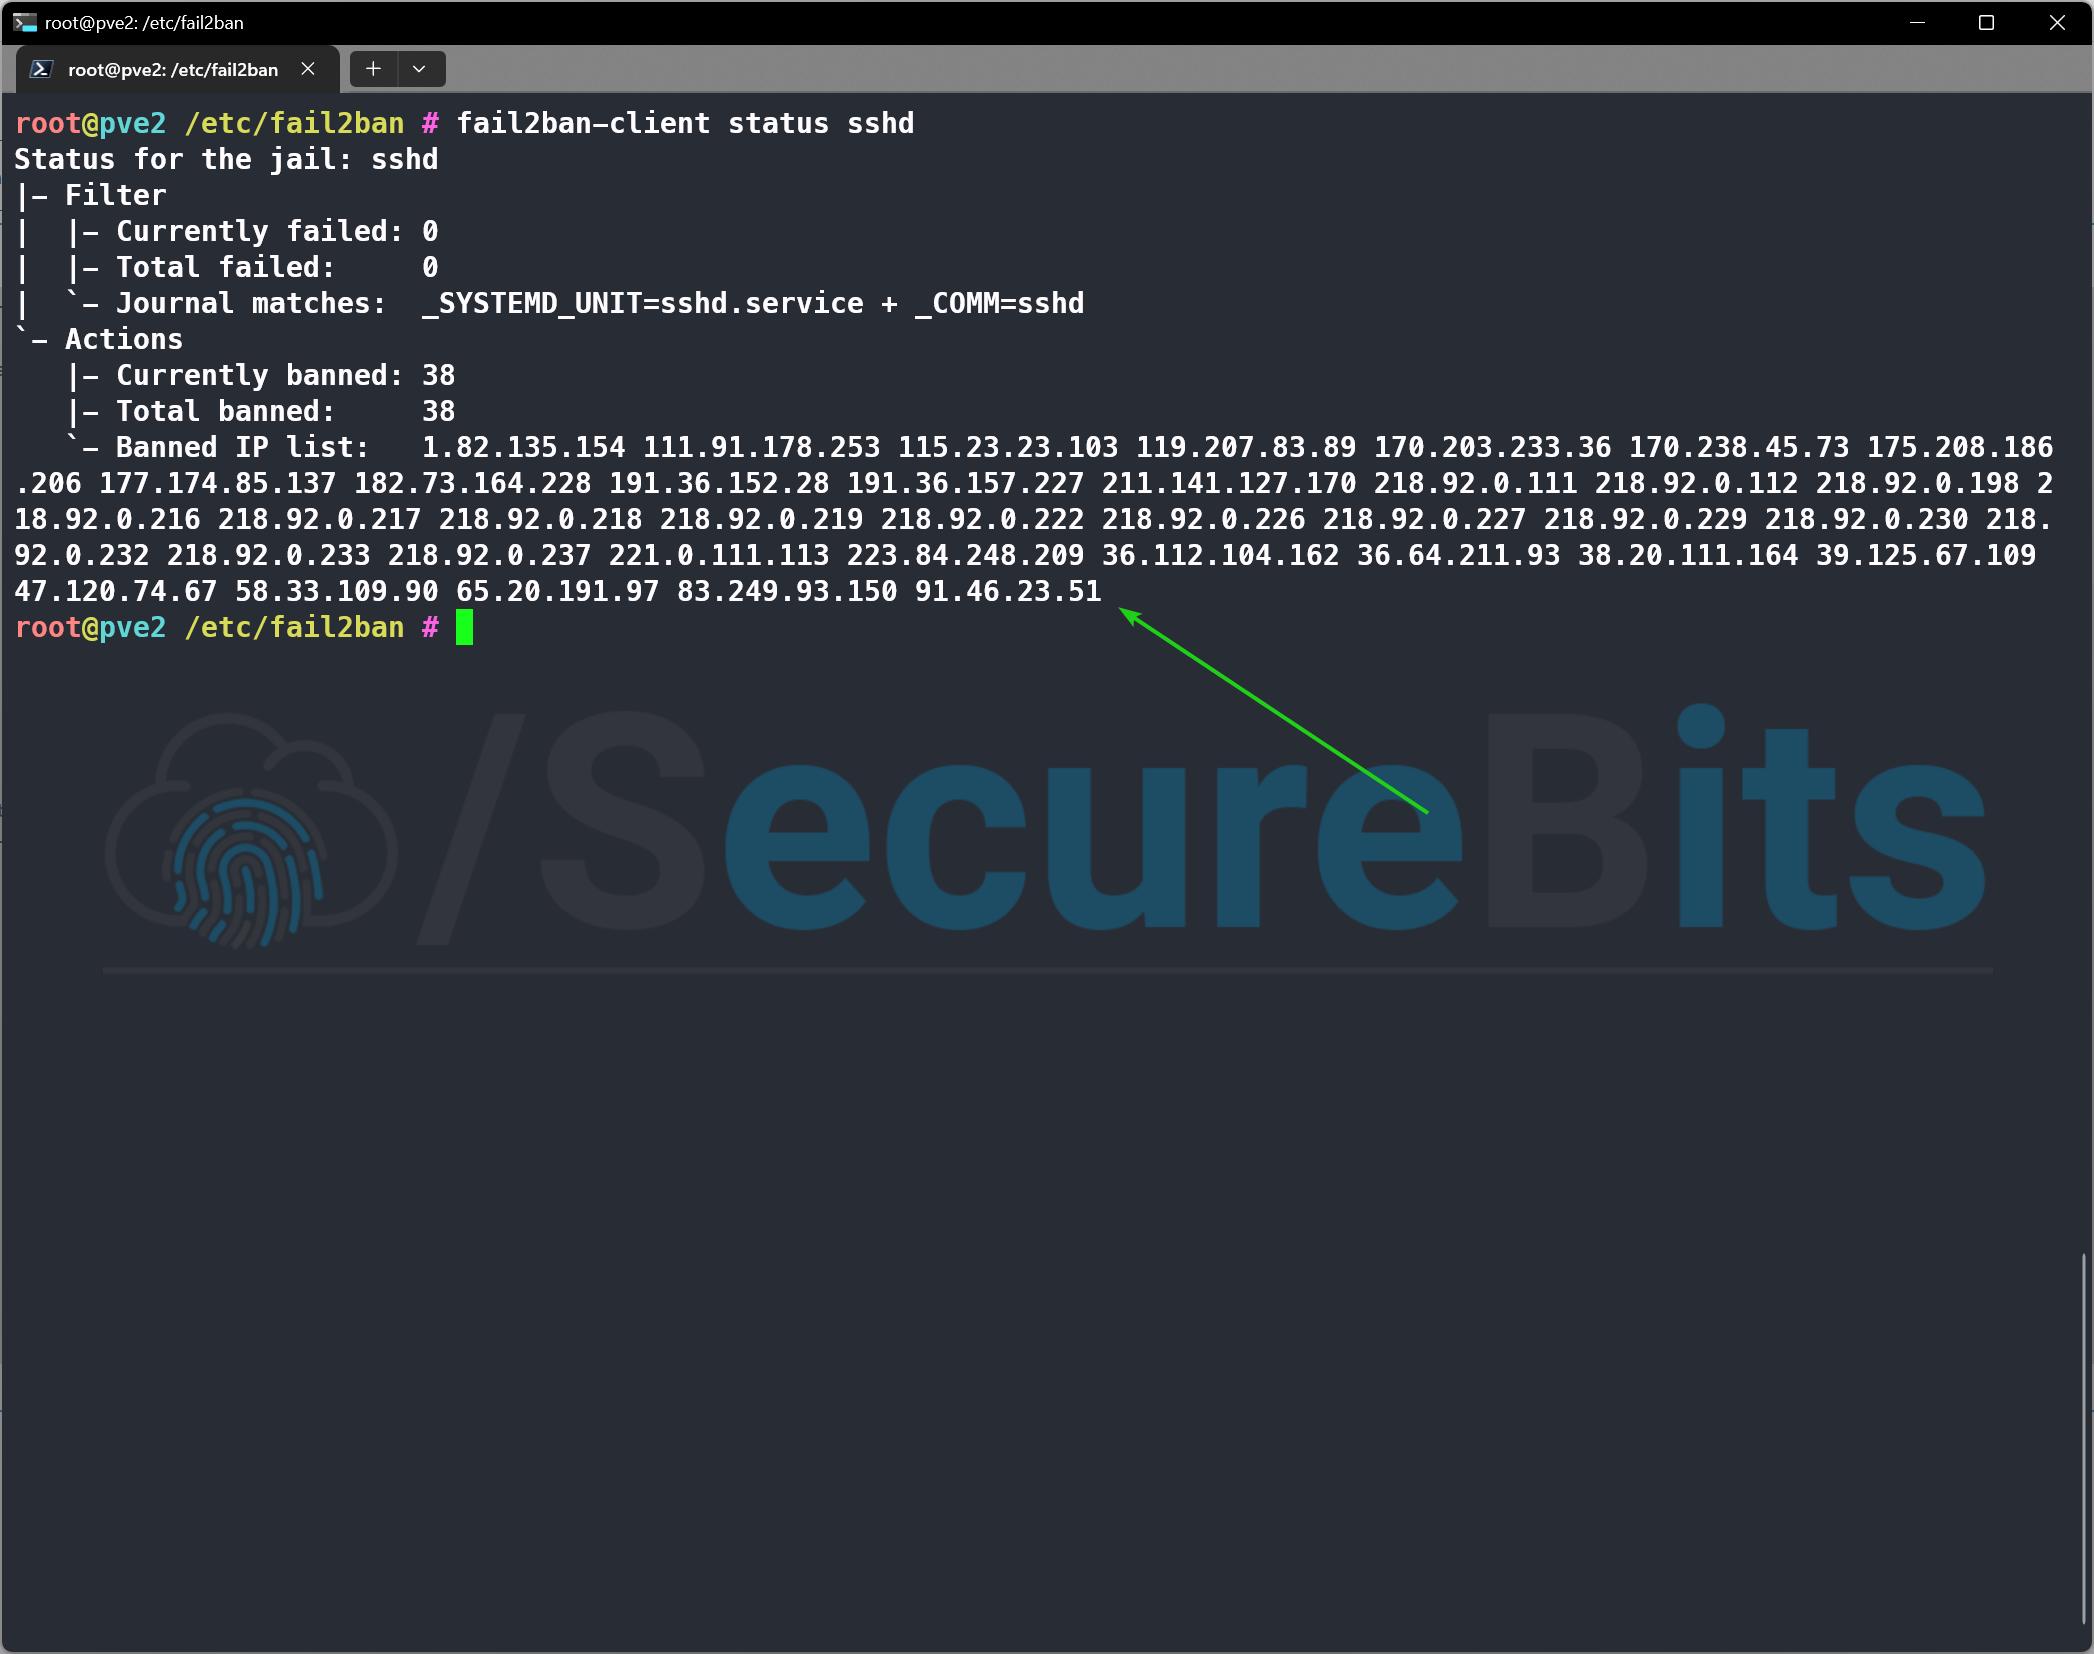
fail2ban-client status sshd

# Blocked IP addresses for Proxmox

fail2ban-client status proxmox
Here is a sample output of the banned IP addresses that tried to log in via SSH.

Remove banned IP address from the jail list
# Remove IP address from the list of banned IP addresses

# For SSH
fail2ban-client set sshd unbanip <IP-Adresse>

# For Proxmox
fail2ban-client set proxmox unbanip <IP-Adresse>
Conclusion – Securing Proxmox VE with fail2ban
As seen in this tutorial, the protection against brute force attacks for a Proxmox server is actually quite trivial and therefore a very good protection in operation.
Furthermore, fail2ban can also be used for other operated services such as nginx, apache2, your own Bitwarden instance, etc. for protection or you can create a filter config yourself as in this tutorial for Proxmox.
My personal opinion on fail2ban
For me personally, the use of fail2ban to secure a server instance is a clear “must” and complements the security layer principle for the secure operation of public services.
Alternative to fail2ban
An alternative to fail2ban is offered with the ‘crowdsec’ application. In principle, crowdsec works in the same way as fail2ban, but is supplemented by centrally managed dynamic lists. However, the disadvantage here is that a public connection to this service is established.
Further information on ‘crowdsec’ can be found here:
I hope this tutorial will bring added value for some of you and help you to secure your Proxmox server instance!
You are also welcome to leave me feedback in the forum or here in the comments.
Further information on fail2ban
Diesen Inhalt teilen:


Post Comment