Pihole PHP 8.3 | Pihole always with the latest PHP version
The text was translated by deepl.
Install Pihole with PHP 8.3 on the Raspberry Pi OS
In this tutorial ‘Installing Pihole with PHP 8.3’ I would like to show you how you can safely install a Pihole DNS server with a current PHP version on your Raspberry Pi in the year 2024.
Background to this tutorial
During a test installation of Pihole with Debian 11 on my Raspberry Pi, I noticed during the installation process that the installation routine on the Raspberry Pi OS lite installs a PHP 7.4, which has not been supplied with security updates since mid-2023 and is therefore EOL (End of Life).
You can find more information about the support of the individual PHP versions here:
https://www.php.net/supported-versions.php
So I thought I would create a new and up-to-date tutorial for you(my last one was from 2022) so that the PHP installation you are using is always provided with the latest security updates.
I will also show you how to install and set up a firewall for the Raspberry Pi. And how to automatically provide the system with new updates.
Video on the topic ‘Installing Pihole in 2024’
As usual, I have also published a video tutorial on this topic on my YouTube channel. So feel free to drop by and subscribe.
Installation of Pihole on a Raspberry Pi
First of all, a list of the requirements we need for the installation and, if necessary, the necessary Amazon links 😉:
Raspberry Pi with power supply unit, SD card and housing
SD-Karten-Lesegerät
- Leistungstarkes USB 3.0 Kartenleser: Ausgestattet mit USB 3.0 Chipsatz kann der Kartenleser…
- 4 in 1 Card Reader: Der 4 in 1 Kartenleser kann viele beliebe Flash-Medien besuchen, wie SD, Compact…
- Plug & Play: Keiner Treiber erforderlich unter Windows XP/Vista/11/10/8/8.1/7, Mac OS und Linux….
- Genügende Kabellänge: Dank des 50 cm langen Kabels beeinträchtigt der USB 3.0-Kartenleser nicht…
- LED Anzeige Licht Design: Mithilfe dieser Leuchte kann der Betriebsstatus dieses USB A…
SD card with adapter | My recommendation
- Original Markenware
- Zwei Jahre Garantie auf Fabrikfehler
- Hochwertige Material
Raspberry Pi PoE+ HAT for Rapberry Pi 4
- Verpackungsabmessungen (L x B x H): 2.489 zm x 7.493 zm x 7.594 zm
- Verpackungsgewicht: 50 g
- Herkunftsland:- China
- Keine Montage erforderlich
PoE-Hat for Raspberry Pi 5
- The PoE HAT (F) is a 802.3af/at-compliant Power Over Ethernet accessory for the Raspberry Pi 5. By…
- Standard Raspberry Pi 40PIN GPIO header, supports Raspberry Pi 5 / CM 5
- PoE (Power Over Ethernet) capability,IEEE 802.3af/at-compliant Fully isolated switched-mode power…
- Onboard high speed active cooling fan, with metal heatsink, better heat dissipation
- Provide e-user manual, please check the manual carefully before using!
Install Raspberry Pi Imager
The ‘Raspberry Pi Imager’ software
First of all, we need to provide our Raspberry Pi with an up-to-date Raspberry Pi OS and therefore, as a first step, we will write the Raspberry Pi OS image to an SD card using the Raspberry Pi Imager.
Download Raspberry Pi OS Imager
After downloading the latest Raspberry Pi Imager, you can simply install the application on your system.
The imager is available for the operating systems Windows, macOS, Ubuntu or can also be installed on an existing RaspberryPi OS with the following command.
# Install Raspberry Pi Imager on Raspberry Pi OS (I have not yet tested this)

sudo apt install rpi-imager
Write Raspberry Pi OS to the SD card
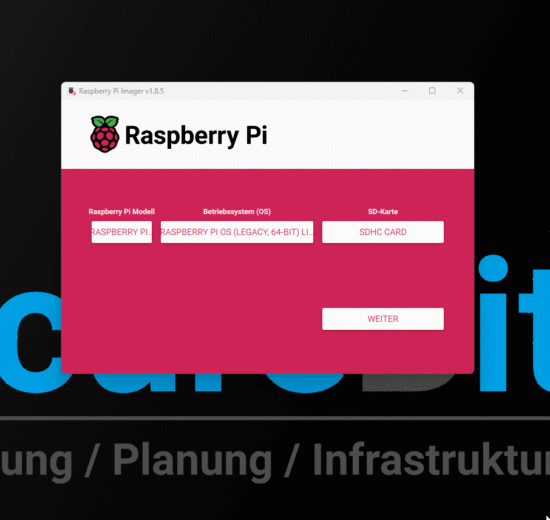
In the gif below you can see the configuration of the Raspberry Pi Imager for a Raspberry Pi OS on a Raspberry Pi 3. Please always select the Raspberry Pi OS 32bit lite version for writing to the SD card! This way, the OS is installed in a minimal version, as this is completely sufficient for the operation of Pihole.
A little tip for Raspberry Pi 3B models
If you want to install Debian 12 “bookworm” with included PHP 8.2 on your Raspberry Pi 3B, please select Raspberry Pi 4 under ‘Raspberry Pi model’. Here you can then select Raspberry OS based on Debian 12. According to Raspberry Pi, Debian 12 is compatible with the 3B model and I can confirm this.
In the model selection, only Debian version 11 “bullseye” is listed under the Raspberry Pi 3B model.
You can see the imager settings in the gif image below:

Please note!
Instead of SSH authentication via password, you should prefer to log in via key pair. You can also set this up after installation. You can find more information in the article Securing the Raspberry Pi from A to Z.
After completing the Raspberry Pi OS image write
When the writing of the SD card has been completed, please remove the card and insert it into your Raspberry Pi.
After plugging in, connect the network cable to the Raspberry Pi and, in this example, to the Fritzbox and then supply the Raspberry Pi with power.
Now the Raspberry Pi boots up and after a certain time you can see the device in the Fritzbox under network connections
Connecting to the Raspberry Pi via SSH
To establish a connection with the Raspberry Pi, I use the Microsoft Terminal for the SSH connection in this example. Of course, you can also use Putty or the usual terminal under macOS and Linux.
To establish an SSH connection, we log in to the Raspberry Pi via SSH using the following commands.
# Command used to establish the SSH connection

sudo ssh benutzernamen@IP-Adresse(vom Pi)

# The first time you connect, you have to accept the fingerprint.
# Confirm this with 'yes'
Update Raspberry Pi OS
Before we can start installing PHP 8.3, we first need to update the Raspberry OS to the latest version. We do this with the following command.
# Check for new packages for Raspberry OS

sudo apt update

# Available packages and dependency changes

sudo apt full-upgrade -y

# The installation may take some time!

# After the update is complete, the system must be restarted.

sudo reboot
Important for PHP installation
It is important to install PHP 8.3 (especially on Debian 11) before installing Pihole, otherwise PHP 7.4 will be installed with the Pihole installation and we want to avoid that.
Pihole PHP | Installing PHP 8.3 on the Raspberry OS
Now we can start the installation of PHP 8.3 on the Raspberry Pi.
To do this, we must first install a package and add a repository to the sources.list.
# Install the required package

sudo apt -y install lsb-release apt-transport-https ca-certificates

# Install security key for the “Sury-Repositorie”

sudo wget -O /etc/apt/trusted.gpg.d/php.gpg https://packages.sury.org/php/apt.gpg
# Installing the package for PHP 8.3

sudo echo "deb https://packages.sury.org/php/ $(lsb_release -sc) main" | tee /etc/apt/sources.list.d/php.list

# Update available packages.

sudo apt update

# Installation von PHP 8.3

sudo apt install php8.3 -y
Installation of sqlite3 for PHP 8.3
After installing PHP 8.3, we need to install the additional sqlite3 module so that Pihole will work properly under PHP 8.3 later on.
To install the PHP module ‘sqlite3’ on our Raspberry Pi OS, we enter the following command in Bash:
# Installation of the PHP module sqlite3 for Pihole to work

sudo apt install php8.3-sqlite3
Follow-up work after installing PHP 8.3 for Piholes
Before we can continue the installation with Pihole, we first have to get rid of the installed web server ‘apache2’. The reason for this is that Pihole uses the lean web server ‘lightptd’ for the admin web interface, so we do not need the Apache web server and this would also lead to errors as it would already occupy port 80.
# Stop the Apache2 service.

sudo systemctl stop apache2

# Uninstall Apache2

sudo apt purge apache2

# After uninstalling, the operating system must be restarted.

sudo reboot
Pihole PHP | Installing Pihole with PHP 8.3
Note
I have described the installation of Pihole on a Raspberry Pi in great detail in my other tutorial. Therefore, I will save the individual steps here and refer you to my previous tutorial or to my video for this post here
More videos and tutorials on the subject of Pihole
I have published many other articles and videos on the subject of ‘Pihole’ here and on YouTube.
Maybe one or the other will help you with your plans for the Pihole! Just click on the links!
Use Pihole on the go on your smartphone
Securing the Raspberry Pi from A to Z
Diesen Inhalt teilen:
Letzte Aktualisierung am 2025-07-03 / Affiliate Links / Bilder von der Amazon Product Advertising API


Post Comment